
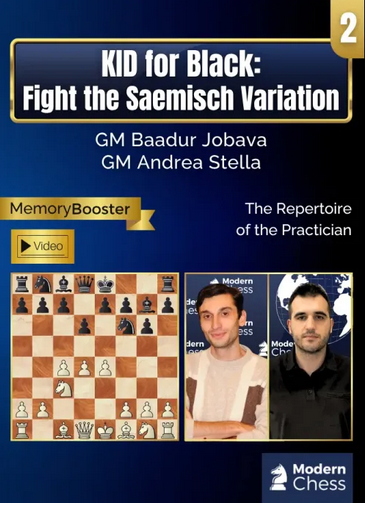
King’s Indian Defense Repertoire for Black – Part 2 + PGN April 30, 2026
Original price was: $ 100.$ 5Current price is: $ 5.
OFF - 95%In stock

Description
Reviews (0)
Description
| Category | Modern Chess, PREMIUM CHESS VIDEO |
|---|
Fight the Saemisch with Purpose: Jobava & Stella’s Systematic Approach to the King’s Indian
When Garry Kasparov dominated the chess world with the King’s Indian Defense, the Saemisch Variation wasn’t just another sideline—it was the system that repeatedly tested his intuition under concrete pressure. White’s central clamp with f3 and e4 creates a position where Black cannot simply rely on standard patterns.
With over 100,000 games in the database, 5.f3 stands as the second most popular response to the King’s Indian—and one of the most challenging to face. Unlike other King’s Indian lines, Black rarely gets the typical kingside attack. The game takes a completely different strategic direction.
This is precisely why GM Baadur Jobava and GM Andrea Stella built their second course around a clear principle: in the Saemisch, Black needs a structured system that transforms White’s space advantage from a strength into a static weakness.
King’s Indian Defense: Fight the Saemisch Variation continues the authors’ repertoire project after their successful King’s Indian Defense: Repertoire for Black – Part 1. Where Part 1 established Black’s strategic foundations against the main lines, Part 2 addresses White’s most direct attempt to suffocate the King’s Indian: the fortress-like Saemisch setup.
Jobava and Stella don’t promise shortcuts. Instead, they provide a decision-making framework—when to strike with …c5, when to maneuver with …Qa5, when to challenge White’s setup with immediate counterplay. The course maps out how Black converts positional understanding into concrete counterplay against White’s rigid pawn chain.
Variation Map
The course covers Black’s complete anti-Saemisch system:
Main Sämisch Structures after 1.d4 Nf6 2.c4 g6 3.Nc3 Bg7 4.e4 d6 5.f3 O-O
- 6.Nge2 c5 7.d5 e6 8.Ng3 exd5 9.cxd5 h5 → Dreev’s flexible system
- 10.Bg5 → Chapter 2: Mainline pinning the knight
- 10.Be2 → Chapter 3: Freeing f1 for the knight
- 6.Bg5 c5 7.d5 e6 8.Qd2 exd5 → Early bishop development
- 9.cxd5 a6 10.a4 Qc7 → Chapter 8: Queenside expansion with …c4, …Nbd7, …Rb8, …b5
- 9.Nxd5 → Chapter 7: Neutralizing White’s concrete try
- 8.Nge2 → Chapter 6: Korobov’s favorite line
- 6.Be3 c5 → Classical Saemisch approach
- 7.dxc5 → Chapter 4: Pawn sacrifice with strong compensation
- 7.Nge2 Qa5 → Chapter 1: Rare but practical, keeping options open
- 7.d5 Qa5 → Chapter 5: Benko-style play with …a6-b5
Alternative Move Orders
- 3.f3 (direct Saemisch) → Chapter 10: Transpositions and independent lines
- 6.Bd3 and 6.g4 → Chapter 9: Rare but sharp tries
What’s Inside
- 10 Chapters – Complete Saemisch coverage
- 20 Test Positions – Calculate critical moments in Saemisch structures
- Memory Booster – Reinforce key tactical patterns and pawn breaks
- To Go Version of every chapter – Review the most important theory quickly
- Video Instruction – Follow the authors’ explanations position by position
- Multilingual PGN availability (English, German, French, Spanish)
Reviews (0)
Leave a Reply
You also like

7 The Paco Vallejo Method – GM Paco Vallejo
Original price was: $ 100.$ 5Current price is: $ 5. Quick ViewAdd to cart
Queen’s Gambit Accepted – Simple Solution to 1.d4 by GM Grigor Grigorov, GM Petar G. Ar...
Original price was: $ 100.$ 5Current price is: $ 5. Quick ViewAdd to cart
100 Repertoires: Four Knights Sicilian
Original price was: $ 100.$ 5Current price is: $ 5. Quick ViewAdd to cart
Killer Instinct Conversion in the Endgame
Original price was: $ 100.$ 5Current price is: $ 5. Quick ViewAdd to cart
Must-Know Structures for 1.d4 Players – Part 1 by Mihail Marin
Original price was: $ 100.$ 5Current price is: $ 5. Quick ViewAdd to cart
A World Champion’s Repertoire against the Queen’s Gambit Declined by Robert Ris (MP4)
Original price was: $ 100.$ 5Current price is: $ 5. Quick ViewAdd to cart
Chessbase Play the Pirc like a Grandmaster Vol. 1: Positional lines CBFT
Original price was: $ 100.$ 5Current price is: $ 5. Quick ViewAdd to cart
BIG Chessbase Magazine Collection From CBM 01 – 213 SDVL (PGN & CBH Collection) 25 GB SI...
Original price was: $ 100.$ 5Current price is: $ 5. Quick ViewAdd to cart
Reviews
There are no reviews yet.